Was this content helpful?
How could we make this article more helpful?
Seagate Secure
The Seagate Secure activity lets you manage security for Seagate and LaCie self-encrypting drives. Use Toolkit to enable security, create a password, and rest easy knowing your data is protected with AES 256-bit encryption technology.
| Supported devices | Product support page | User manual |
|---|---|---|
| LaCie Mobile Drive Secure | Product | Documentation |
| LaCie Mobile SSD Secure | Product | Documentation |
| LaCie Rugged RAID Shuttle | Product | Documentation |
| LaCie Rugged Secure | Product | Documentation |
| LaCie Rugged SSD | Product | Documentation |
| Seagate Backup Plus Ultra Touch | Product | Documentation |
| Seagate One Touch with Hub | Product | Documentation |
| Seagate One Touch with Password | Product | Documentation |
Enable security with Toolkit
Toolkit is required to enable security for self-encrypting drives.
- Connect the device to your computer.
- Open Toolkit.
- On the Main Menu, click on the Seagate Secure activity.
- Click Enable.
| macOS 10.13 or later |
|---|
A driver needs to be installed. At the prompt, use the Finder to eject the drive, and then disconnect the cable from the computer. Toolkit will prompt you to enable a system extension. Click Next to navigate to your Security & Privacy System Preferences and enable the system extension signed by “Seagate Technologies LLC”. |
- A notice appears informing you that you will create a password that you must remember or keep safe, as it can’t be recovered. Click the checkbox to acknowledge the notification, and then click Next.
- Enter the 8-character secure code (SID) listed on the insert that was included in your device packaging. Note that the secure code is case-sensitive, meaning that it distinguishes between upper-case and lower-case letters. Click Next.
- Click Next.
- Create a password that you will use to unlock the drive on any computer. In the upper field, enter a password that’s easy to remember but difficult to guess. Note that the password you create is case-sensitive, meaning that it distinguishes between upper-case and lower-case letters. Enter the same password in the lower field to confirm, and click Next.
- (optional) Create a password hint. In the event you forget your password, you can view your hint to help you remember it. Enter your password hint and click Next.
Optional password reset key setup
You can set up a key that lets you reset your password if you forget your current password, while preserving the data on your drive.
At the prompt, enter your Seagate/LaCie account information and click Sign In. If you don’t have a Seagate/LaCie account, click Create Account to open a web page where you can create one. You’ll need to validate and activate your new account.
After the password reset key has been created, make certain to note your Seagate/LaCie account information in case you need it to reset the password at a future date. See Set up a password reset key and Use a password reset key for more details.
- Click Done.
Unlock the drive
To access data on the drive, you must enter the password you created with the Toolkit app. You can enter your password using Toolkit. If Toolkit is not installed on the computer, you can run the appropriate Unlock Drive app for your operating system located on the drive.
Entering your password with Toolkit
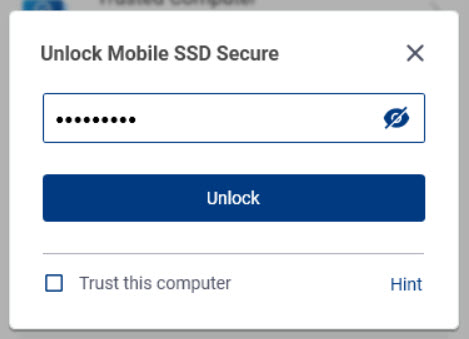
Each time you connect your drive to a computer with Toolkit installed, you’ll be prompted to enter your password.
- In the dialog, enter the password you created when you enabled security.
- Click Unlock.
If the prompt doesn’t appear automatically when you connect the drive:
- Open Toolkit.
- On the Main Menu, click on the Seagate Secure activity.
- On the Seagate Secure screen, click Unlock.
- At the prompt, enter your password and click Unlock.
Entering your password with the Unlock Drive app
If you connect the device to a computer that does not have Toolkit installed, you can enter your password using the Unlock Drive app located on the drive.
- Using a file manager such as File Explorer or Finder, open the DriveLocked volume.
- Click on Unlock Drive for Windows or Unlock Drive for Mac.
| macOS 10.13 or later |
|---|
A driver needs to be installed. At the prompt, use the Finder to eject the drive, and then disconnect the cable from the computer. Toolkit will prompt you to enable a system extension. Click Next to navigate to your Security & Privacy System Preferences and enable the system extension signed by “Seagate Technologies LLC”. |
- Enter the password you created for the drive.
- Click OK.
Exceeding the maximum number of failed password attempts
If you reach the maximum number of consecutive failed password attempts, your drive will be temporarily disabled. Disconnect and reconnect your drive, and then retry with the correct password.
Lock the drive
The drive is locked automatically whenever it is ejected or disconnected from your computer. You must enter your password again when you reconnect the drive.
You can also manually lock the drive while it’s connected to a computer.
- Open Toolkit.
- On the Main Menu, click on the Seagate Secure activity.
- On the Seagate Secure screen, click Lock.
- In the dialog, enter your password and click Lock.
Change your password
Use Toolkit to change your password.
- Open Toolkit.
- On the Main Menu, click on the Seagate Secure activity.
- On the Seagate Secure screen, click Change Password.
- A notice appears informing you that you will create a password that cannot be recovered. Click Next.
- In the upper field, enter your current password.
- Enter your new password in the middle field, and then enter the same new password in the lower field to confirm.
- (Optional) You can create a password hint, which you can view later in the event you've forgotten your password. Enter the password hint in the field.
- Click Next.
- You’ve now secured the drive with a new password. Click Done.
Set up a password reset key
You can set up a key that lets you reset your password if you forget your current password, while preserving the data on your drive.
Requirements
- Set up the password reset key before you forget your current password.
- A Seagate/LaCie account is required to set up a password reset key. Create a new account, or sign in with an existing account. An internet connection is required. New users will need to validate and activate their new account.
- Multi-user drives—Only an admin can set up and use a password reset key.
- The password key feature is available in Seagate Secure version 3.0 or higher. To view your Toolkit version:
- From the Home screen, click on the More menu and select Settings.
- Click About.
Password reset key setup after security is enabled
You’re prompted to set up a password reset key when enabling security for your drive. However, if security has already been enabled, you can set up a password reset key on the Seagate Secure screen:
- Open Toolkit.
- On the Main Menu, click on the Seagate Secure activity.
- On the Seagate Secure screen, click Reset Key.
- Click Set Up.
- Enter your current Seagate Secure admin password. Click Continue.
- You’re prompted to enter your PSID. This is the 32-character reset code listed on the insert that was included in your device packaging. Enter the 32-character PSID. (Toolkit will automatically change lower-case letters to upper-case.)
| No longer have the insert with the PSID? |
|---|
| You can also find the PSID on a sticker on the hard drive. Note for LaCie Rugged Secure and Rugged RAID Shuttle drives—the sticker is located under the protective bumper. |
- At the prompt, enter your Seagate/LaCie account information and click Sign In. An internet connection is required.
After the password reset key has been created, make certain to note your Seagate/LaCie account information in case you need it to reset the password at a future date.
Use a password reset key
If you previously set up a password key, you can use it to reset the drive's password.
- At the password prompt, click Forgot password?.
- You’re prompted to enter your PSID. This is the 32-character reset code listed on the insert that was included in your device packaging. Enter the 32-character PSID. (Toolkit will automatically change lower-case letters to upper-case.)
| No longer have the insert with the PSID? |
|---|
| You can also find the PSID on a sticker on the hard drive. Note for LaCie Rugged Secure and Rugged RAID Shuttle drives—the sticker is located under the protective bumper. |
- At the prompt, enter your Seagate/LaCie account information and click Sign In. An internet connection is required.
- On the Password Reset screen, enter your new password, and then enter the same new password in the field below it to confirm.
- (optional) You can create a password hint, which you can view later in the event you forget your password again. Enter the password hint in the field.
- (optional) Click the Trusted computer checkbox configure Toolkit to automatically unlock a drive when it's connected to a trusted computer.
- Click Next.
- Click Done.
Trusted computers
You can configure Toolkit to automatically unlock a drive when it's connected to a computer that you've designated as "trusted". Use this setting only on a computer that no one else uses. You'll still need a password to unlock the drive when connected to other computers.
- Connect your drive to a computer installed with Toolkit.
- At the prompt, enter the password you created when you enabled security.
- Check the Trust this computer checkbox.
- Click Continue.
If the prompt doesn’t appear automatically when you connect the drive:
- Open Toolkit.
- On the Main Menu, click on the Seagate Secure activity.
- On the Seagate Secure screen, click Unlock.
- At the prompt, enter your password.
- Check the Trust this computer checkbox.
- Click Continue.
If your connected drive is already unlocked, do the following:
- Open Toolkit.
- On the Main Menu, click on the Seagate Secure activity.
- On the Seagate Secure screen, click Trusted Computer.
- Click the Trust this computer toggle to enable the setting.
- At the prompt, enter your password and click Continue.
- Click Done.
Removing trusted computer status
To remove trusted computer status from a computer:
- Connect your drive to the trusted computer.
- Open Toolkit.
- On the Main Menu, click on the Seagate Secure activity.
- On the Seagate Secure screen, click Trusted Computer.
- Click the Trust this computer toggle to disable the setting.
- Click Done.
Multi-user access
You can provide a second user with secure access to your storage device.
Adding another user changes the unlock prompt when connecting the secure drive to a computer. When only a single user is enabled, the secure drive requires a single password for the owner or 'admin' of the drive:
With multi-user enabled, the user unlocking the drive must enter both their username and password.

As the owner of the secure drive, your username is "Admin" and you continue to enter the same password. You'll provide the second user with a username and an initial password. The second user can access content on the drive but cannot perform all security actions:
| Secure Actions | Admin | User |
|---|---|---|
| Change Password | ✓ | ✓ |
| Password Reset Key | ✓ | ✗ |
| Disable Security | ✓ | ✗ |
| Trusted Computer | ✓ | ✓ |
| Manage Multi-User | ✓ | ✗ |
| Crypto-Erase | ✓ | ✗ |
| Reset | Anyone with the PSID can reset the drive | |
- Open Toolkit.
- On the Main Menu, click on the Seagate Secure activity.
- On the Seagate Secure screen, click Manage Multi-User.
- Click the Multi-user radio button, and then click Next.
- You're prompted to confirm your administrator password. Enter your password and click Next.
- Click Add User. A dialog box appears.
- Enter a username for the second user. This is the username the second user will enter when unlocking the drive.
- Enter a password for the second user. This is the password the second user will enter when unlocking the drive. Choose a password that’s easy to remember but difficult to guess. Note that the password you create is case-sensitive, meaning that it distinguishes between upper-case and lower-case letters.
- Enter the same password in the lower field to confirm.
- (optional) Create a password hint. You can create a hint to help you remember the password you created for the second user.
- Click Save.
Editing the second user
The administrator can edit the second user's username and password.
- Open Toolkit.
- On the Main Menu, click on the Seagate Secure activity.
- On the Seagate Secure screen, click Manage Multi-User.
- At the prompt, enter your admin password and click Continue.
- In the user listing, click on the More icon (
 ) and select Edit.
 - Edit the user's details and click Save.
- Click Done.
Disabling the second user
The administrator can disable the second user but maintain their details so they can be re-enabled later.
- Open Toolkit.
- On the Main Menu, click on the Seagate Secure activity.
- On the Seagate Secure screen, click Manage Multi-User.
- At the prompt, enter your admin password and click Continue.
- In the user listing, click on the More icon () and select Disable.
- At the prompt, click Disable to confirm.
- Click Done.
Deleting the second user
The administrator can delete the second user.
- Open Toolkit.
- On the Main Menu, click on the Seagate Secure activity.
- On the Seagate Secure screen, click Manage Multi-User.
- In the user listing, click on the More icon () and select Delete.
- At the prompt, click Delete to confirm.
- Click Done.
Disable security
If you disabled security at some point, you can re-enable it using the password you created.
- Open Toolkit.
- On the Main Menu, click the Seagate Secure activity.
- On the Seagate Secure screen, click Enable Security.
- Enter the password you created when you first enabled security.
- Click Continue.
Re-enable security
If you disabled security at some point, you can re-enable it using the password you created.
- Open Toolkit.
- On the Main Menu, click the Seagate Secure activity.
- On the Seagate Secure screen, click Enable Security.
- Enter the password you created when you first enabled security.
- Click Continue.
Crypto-erase the drive
A crypto-erase securely deletes all data on the drive—it can never be recovered—while keeping your security settings in place. Your password remains the same.
- Open Toolkit.
- On the Main Menu, click on the Seagate Secure activity.
- Click the Seagate Secure screen, click Crypto Erase.
- A notification appears informing you that you will erase all the data on the drive but maintain your security settings. Click Erase.
- A dialog box appears. Enter your password to confirm, and then click Continue.
Reset the drive to factory settings
A factory reset deletes all data on the drive and removes all security settings, including your password. The drive reverts to its original factory settings.
- Open Toolkit.
- On the Main Menu, click on the Seagate Secure activity.
- On the Seagate Secure screen, click Factory Reset.
- A notification appears informing you that you will erase all the data on the drive and remove your security settings. Click Reset.
- You’re prompted to enter your PSID. This is the 32-character reset code listed on the insert that was included in your device packaging. Enter the 32-character PSID. (Toolkit will automatically change lower-case letters to upper-case.)
| No longer have the insert with the PSID? |
|---|
| You can also find the PSID on a sticker on the hard drive. Note for LaCie Rugged Secure and Rugged RAID Shuttle drives—the sticker is located under the protective bumper. |
- Click Continue.
Previous Toolkit versions (Windows 7 | 8 | 8.1)
In legacy versions of Toolkit, all security-related actions are accessed through a menu on the Seagate Secure screen:
- Open Toolkit.
- On the Main Menu, click on the Seagate Secure activity.
- On the Seagate Secure screen, click on the More icon ().
- Select an action.