Twitter Facebook Google Plus Linked in
Disk Utility has the ability to combine the resources of several external devices. This is called a RAID (Redundant Array of Inexpensive/Independent Disks). Mac OS has three RAID modes available.
To begin, open the Disk Utility program. This is within the Applications folder, then the Utilities folder.
Locate the drives that will be part of the array on the left side of the program.
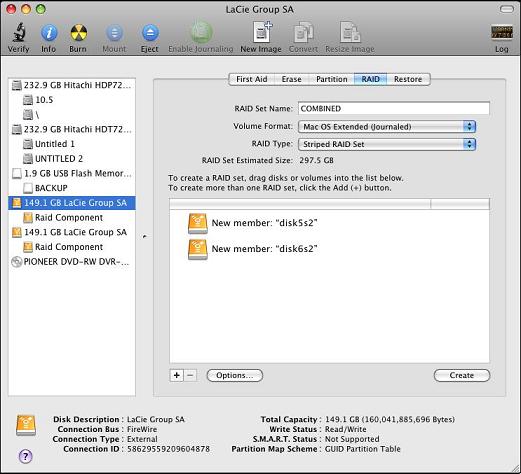
In this example, we will be creating a Raid from the two 149.1GB drives. Click the RAID tab along the top of the window. Drag and drop the two drives into the blank window on the right.
For "RAID set name", type in the name of the volume that will appear on the desktop.
For "Volume format", select Mac OS Extended (Journaled). Other formats are available, but the best performance will be with one of the native Mac formats.
For "RAID Type", the choice depends upon the individual needs for the device (striped, concatenated, or mirrored.)
Click the create button, and this window will appear
This is a warning that the data will be erased from all involved hard drives. Click "Create" to continue. When finished, Disk Utility will look similar to this window
The example shows that there is a new volume called "COMBINED", that is a striped combination of the two 149.1 GB disks. It has a total available space of 297.5GB.