There may be instances when unlocking a Seagate Secure enabled locked drive that the drive is not being shown in Windows Explorer. If the drive is detected in Disk Management but without a drive letter, use the following steps to help resolve the issue.
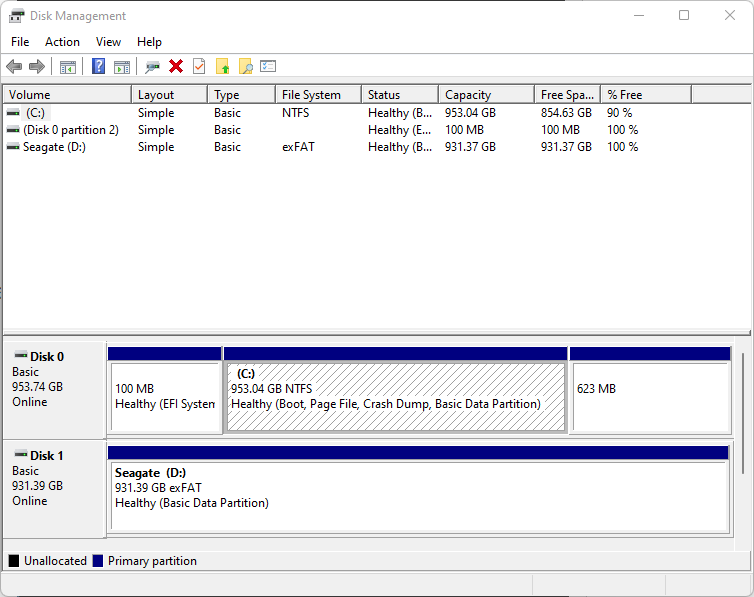
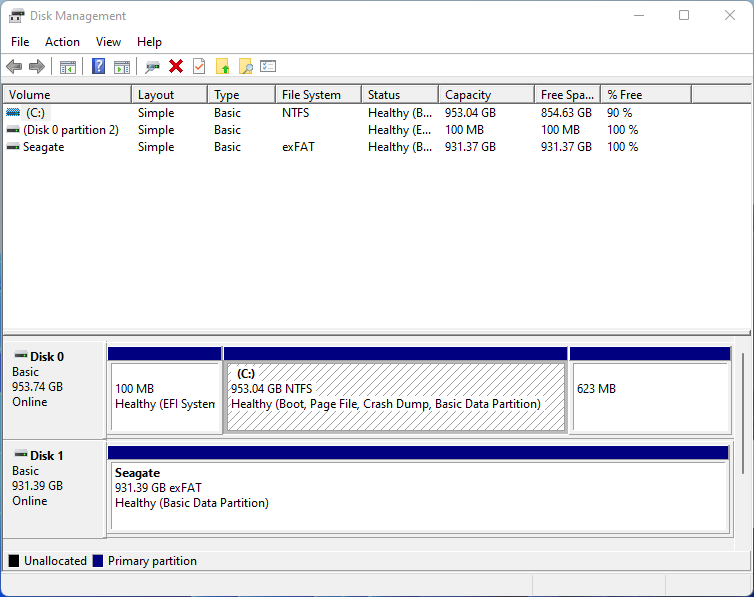
First check Disk Management to confirm that a drive letter is not being assigned automatically.
- Using Windows search, search for Disk Management
- Open Disk Management to determine the drive letter assigned
NOTE: Search will show “Create and format disk partitions”
- Locate the drive and note the Disk number assigned to the drive.
NOTE: In this example below, the Disk number is 1. Your drive may have a different number, please note the number or leave the window open. That number will be used during the reset of the process.
IMPORTANT: This article explains the Microsoft Diskpart utility. This utility can also be used to erase the drive, so please follow the steps exactly. If there are any concerns during the process, do not proceed.
Steps to clear volume attribute:
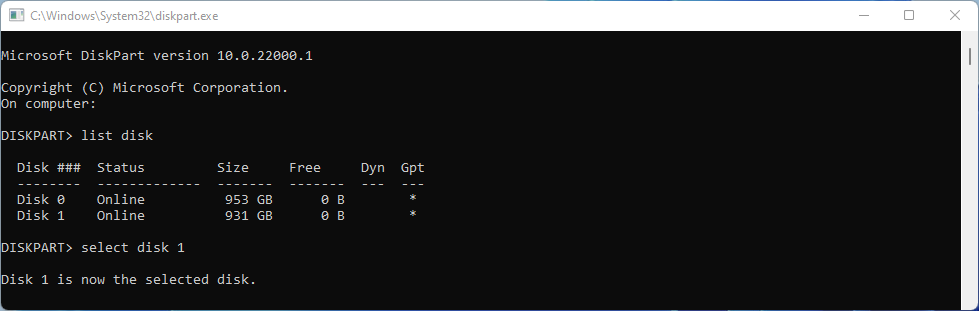
- Using Windows search, search diskpart
- The diskpart prompt will open, type list disk and press the Enter key
- In this example, type select disk 1 and press the Enter key
IMPORTANT: Your disk number may be different, use the one assigned by Disk Management shown earlier.
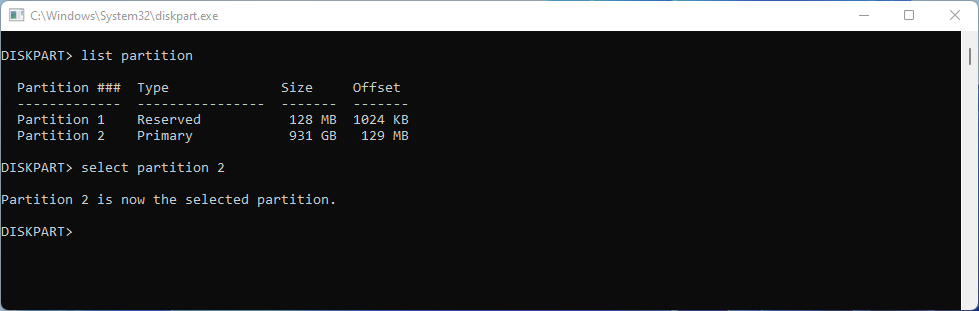
- Type list partition and press the Enter key
- Type select partition 2 and press the Enter key
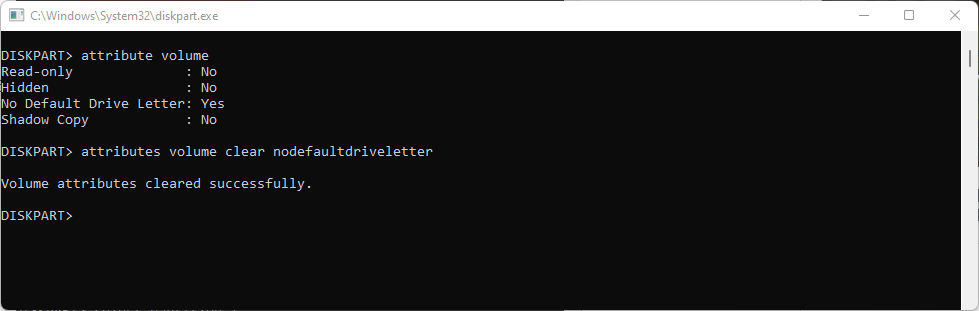
- Type attribute volume and press the Enter key
IMPORTANT: Look to see if “No Default Drive Letter” is set to “Yes”. If it is set to “Yes”, then the attribute needs to be cleared. If it is already set to “No”, the issue in this article does not apply, please use the USB troubleshooter for other options.
- If set to “Yes”, type attributes volume clear nodefaultdriveletter and press the Enter key
- Safely eject the drive and reconnect the drive. Unlock the drive when prompted by Toolkit, a drive letter should now be assigned automatically and accessible in Explorer.