Twitter Facebook Google Plus Linked in
IMPORTANT: This article applies to the following macOS versions:
Need Help?
It is important to keep the following in mind when formatting Mac OS Extended (Journaled):
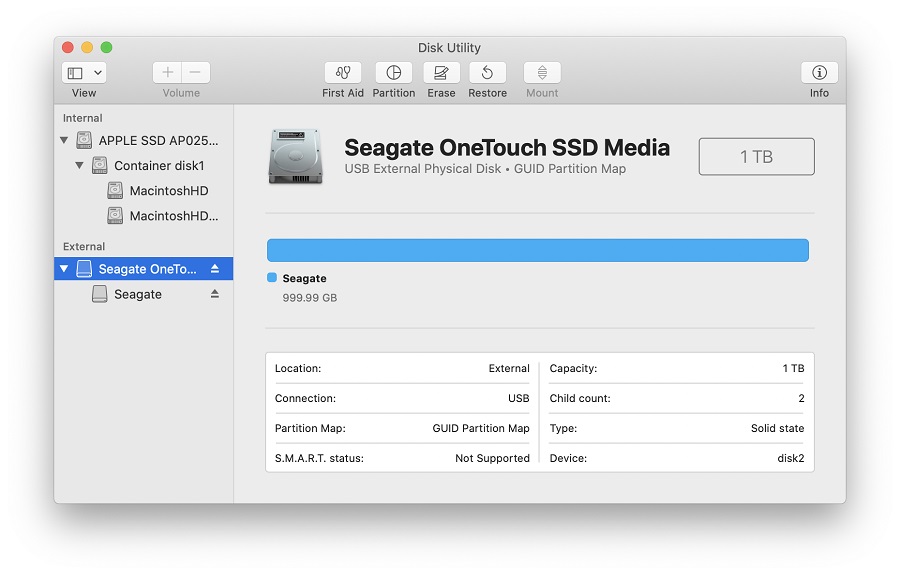
IMPORTANT: Reformatting the drive will erase all data on the drive, so you should copy any data you want off the drive prior to formatting.

Click the button labeled Erase in the menu which will bring up this window.
NOTE: If you don’t see Scheme, then make sure that all devices are showing and the non-indented entry is selected. Check step 2 to confirm Disk Utility is Showing All Devices.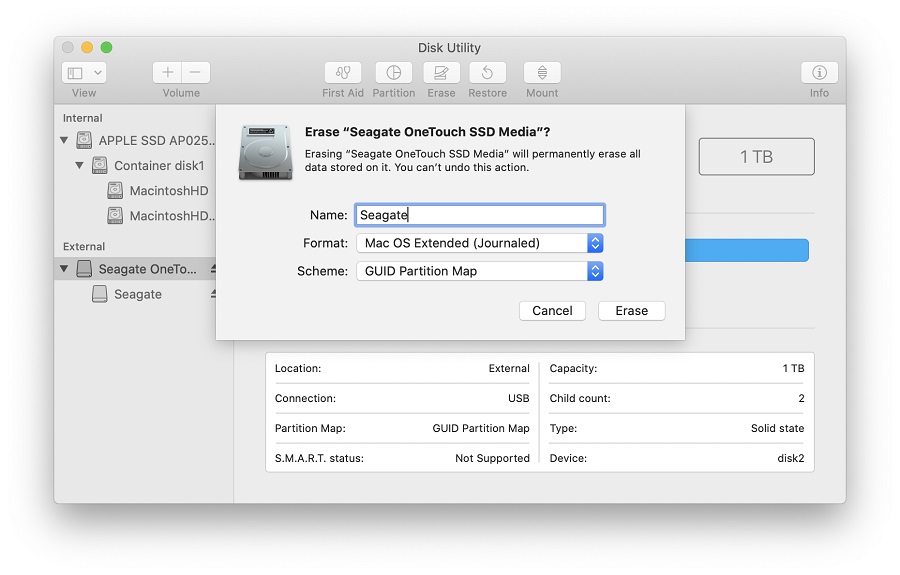
Provide a Name for the volume
Set Format to Mac OS Extended (Journaled)
Set Scheme to GUID Partition Map
WARNING: Formatting the drive will erase all data on the drive, so you should copy any data you want off the drive prior to formatting.
Click the Erase button, Disk Utility will start formatting the drive
Once complete, click Done
The drive should now be formatted Mac OS Extended (Journaled) and can be confirmed by selecting the indented entry which will now show Volume Mac OS Extended (Journaled) under the name you provided