Was this content helpful?
How could we make this article more helpful?
Getting Connected
Installing your LaCie hard drive is easy thanks to LaCie Setup Assistant. Follow the setup steps in the order they are given to ensure that your LaCie hard drive's volume mounts correctly on your computer.
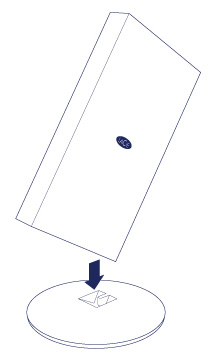
STEP 1 - Connect to the base
Place the LaCie Chromé on its base. Make certain to carefully align the ends of Chromé’s stand with the landing points on the base. The magnetic ends allow for an easy connection.
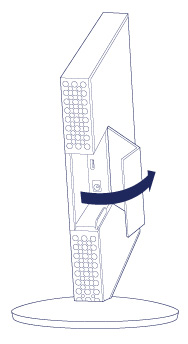
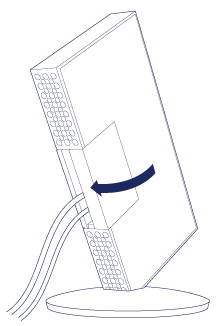
STEP 2 – Open the port protector
Gently open the port protector and keep it ajar for the next steps.
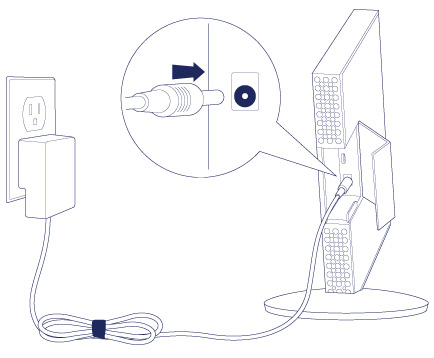
STEP 3 - Connect the power supply
Connect the power supply to a wall outlet and to the hard drive. Only use the power supply provided with your LaCie Chromé.
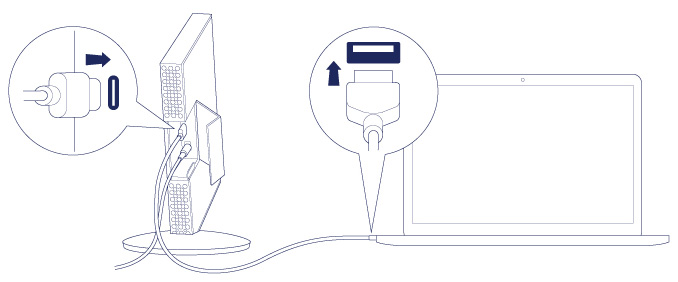
STEP 4 - Connect the USB cable
Before connecting the LaCie device, confirm the USB port on your computer. Your LaCie device is shipped with two cables (see LED Indicator and Cables):
- USB-C–to–USB-C: use this cable if your computer has a USB-C port.
- USB-C–to–USB 3.0/2.0 Type A: use this cable if your computer does not have USB-C port.
Connect the cable to the USB-C port on the back of the LaCie Chromé and to your computer.
- The image below shows a connection to a computer with a USB-C port.

- The image below shows a connection to a computer with a USB 3.0 or 2.0 Type A port.
STEP 5 – Close the port protector
Gently close the port protector.
STEP 6 - LaCie Setup Assistant
The drive partition LaCie Setup mounts on your desktop (Mac) or in Computer (Windows).
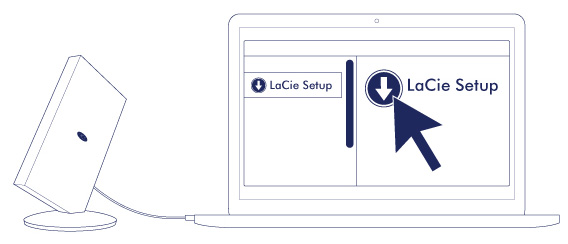
LaCie Setup Assistant must be launched before using your drive. It allows you to:
- Easily format the hard drive according to your needs.
- Copy the user manual to the hard drive.
- Install software for added features.
- Register your LaCie device.
Launch LaCie Setup Assistant - Mac
Open the LACIE SETUP volume on your desktop and then double click LaCie Setup.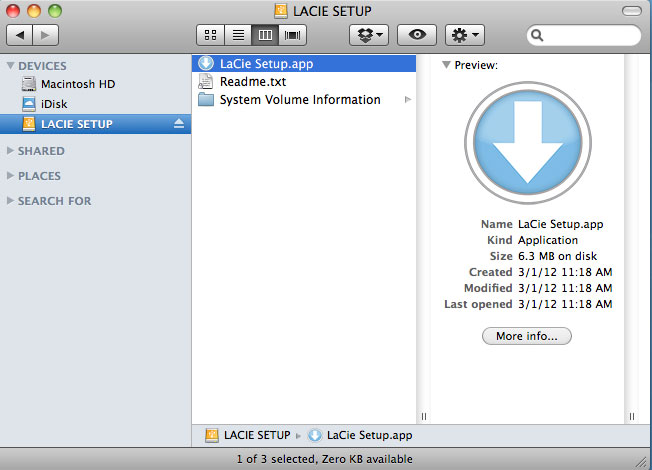
Launch LaCie Setup Assistant - Windows
AutoPlay: Windows AutoPlay may detect your LaCie hard drive as soon as it is connected to your computer. If the AutoPlay window appears, choose Open folder to view files using Windows Explorer and double-click LaCie Setup.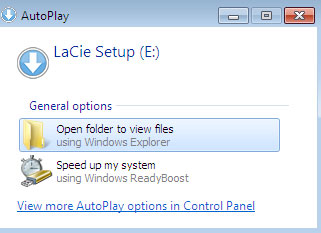
Manual access: open the LACIE SETUP volume in Computer and double-click LaCie Setup.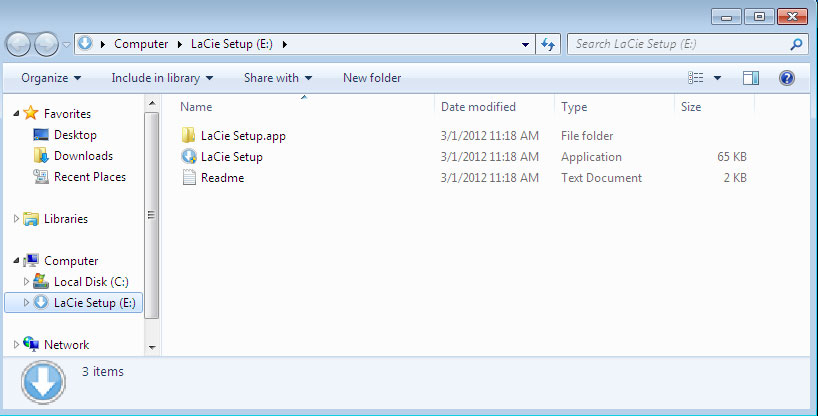
LaCie Setup Assistant steps
Follow the steps below to format your LaCie device for your operating system. LaCie Setup Assistant guides you through formatting and registering your hard drive as well as installing LaCie software utilities.
You can also use your system's native disk utility program to format or partition your LaCie drive. If you use the disk utility, you can download software utilities and the user manual from LaCie customer support.
- Select your language.
- Read the license agreement before choosing Next. Selecting Next confirms that you accept the license agreement.
- Use the slider to partition your LaCie hard drive. There are two options for partitions:
- LaCie Share: formatted as FAT32 for compatibility with Windows and Mac.
- LaCie: formatted for your operating system, NTFS for Windows or HFS+ for Mac.
- A prompt alerts you that the disk will be formatted. Select Yes to continue. LaCie Setup Assistant formats the hard drive.
- Register your LaCie device.
- Choose the software utilities that you want to install. Certain software utilities may begin to install before LaCie Setup Assistant has finished. Follow the software utility installer before completing LaCie Setup Assistant. If you do not install software utilities during this step, you can return to LaCie Setup Assistant at any time.
- LaCie Setup Assistant provides a summary of the installation. Choose Finish to close the program.
To install software utilities after the initial installation, you can run LaCie Setup Assistant again. Since the format is complete you are only prompted to choose software utilities. LaCie Setup Assistant is available on:
- LaCie Share: if you created two partitions
- LaCie: if you created one partition